Scanning from magazines (Photoshop)
If you’ve ever tried to scan an image or article from a magazine and some books, you’ve probably noticed that the scanner picks up all the ugly little dots that make up the image instead of presenting it to you as you see it: more uniform bodies of color.
I just re-discovered the problem myself, and after refreshing myself on how to get rid of the problem at scantips.com ‘s Descreen for moiré tutorial, I thought I’d make a simpler tutorial myself. Their article is full of all the technical explanations and whatnot, so if you’re interested in those, go take a peek there. If, however, you’re as simpleminded as me and you just want to know how to get rid of it, keep reading here.
Unfortunately, my tutorial assumes that you have Adobe Photoshop and not a descreening function built into the scanner. Scantips offers some tips on what to do if this isn’t your situation.
The first step is to scan in the image at twice the resolution you intend to present the final product in. I like to have my files at 300 dpi, so if you’re like me, you should scan it in at 600 dpi. (This can usually be found under the custom options of your scanner).
Then, zoom in nice and close and take a look at the sucker at 100% zoom. Observe the pattern and frown. Then whip out your handy-dandy Gaussian Blur (Filter » Blur » Gaussian Blur…). Fiddle with the options like in the image below and blur it just until the dots are gone. You don’t want to blur it too much or the image quality will suffer. Remember the radius that you used here, as you’ll need the same radius in the next step.

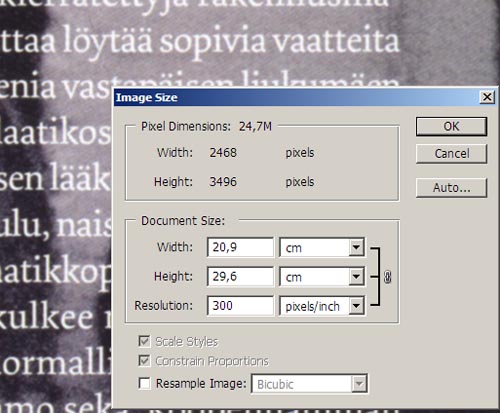
Then shrink the image size by 50%. You’ll notice the moiré is gone, but that your image now looks pretty blurry. Also, go in a second time and change the image Resolution down to 300dpi (assuming you scanned with 600dpi), making sure that Resample Image is unchecked. Now your image will print out in the same size as it would have originally despite your shrinking the image by 50%.
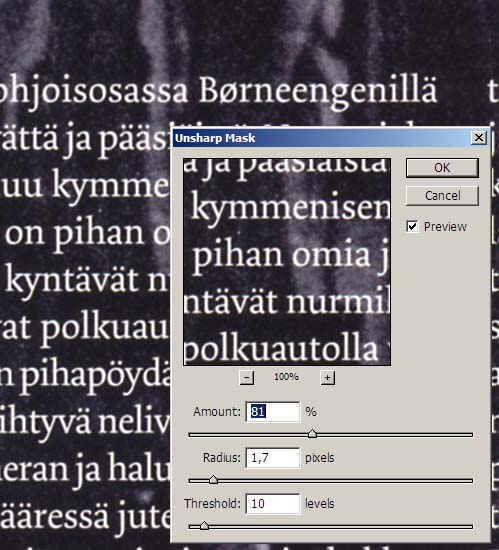
Now it’s time to bring out your secondary weapon - Unsharp Mask (Filter » Sharpen » Unsharp Mask…). Shove in the same radius amount as you used in the Gaussian Blur. Twiddle with the other options until you get a satisfying result. Remember to compare both image areas and text areas, making sure you don’t sharpen too much or too little in either area.
Finally, use your weapon of choice for adjusting the image brightness and contrast, layers, etc to a more accurate reading. Look at the original magazine colors as reference.

Comments
Post a Comment